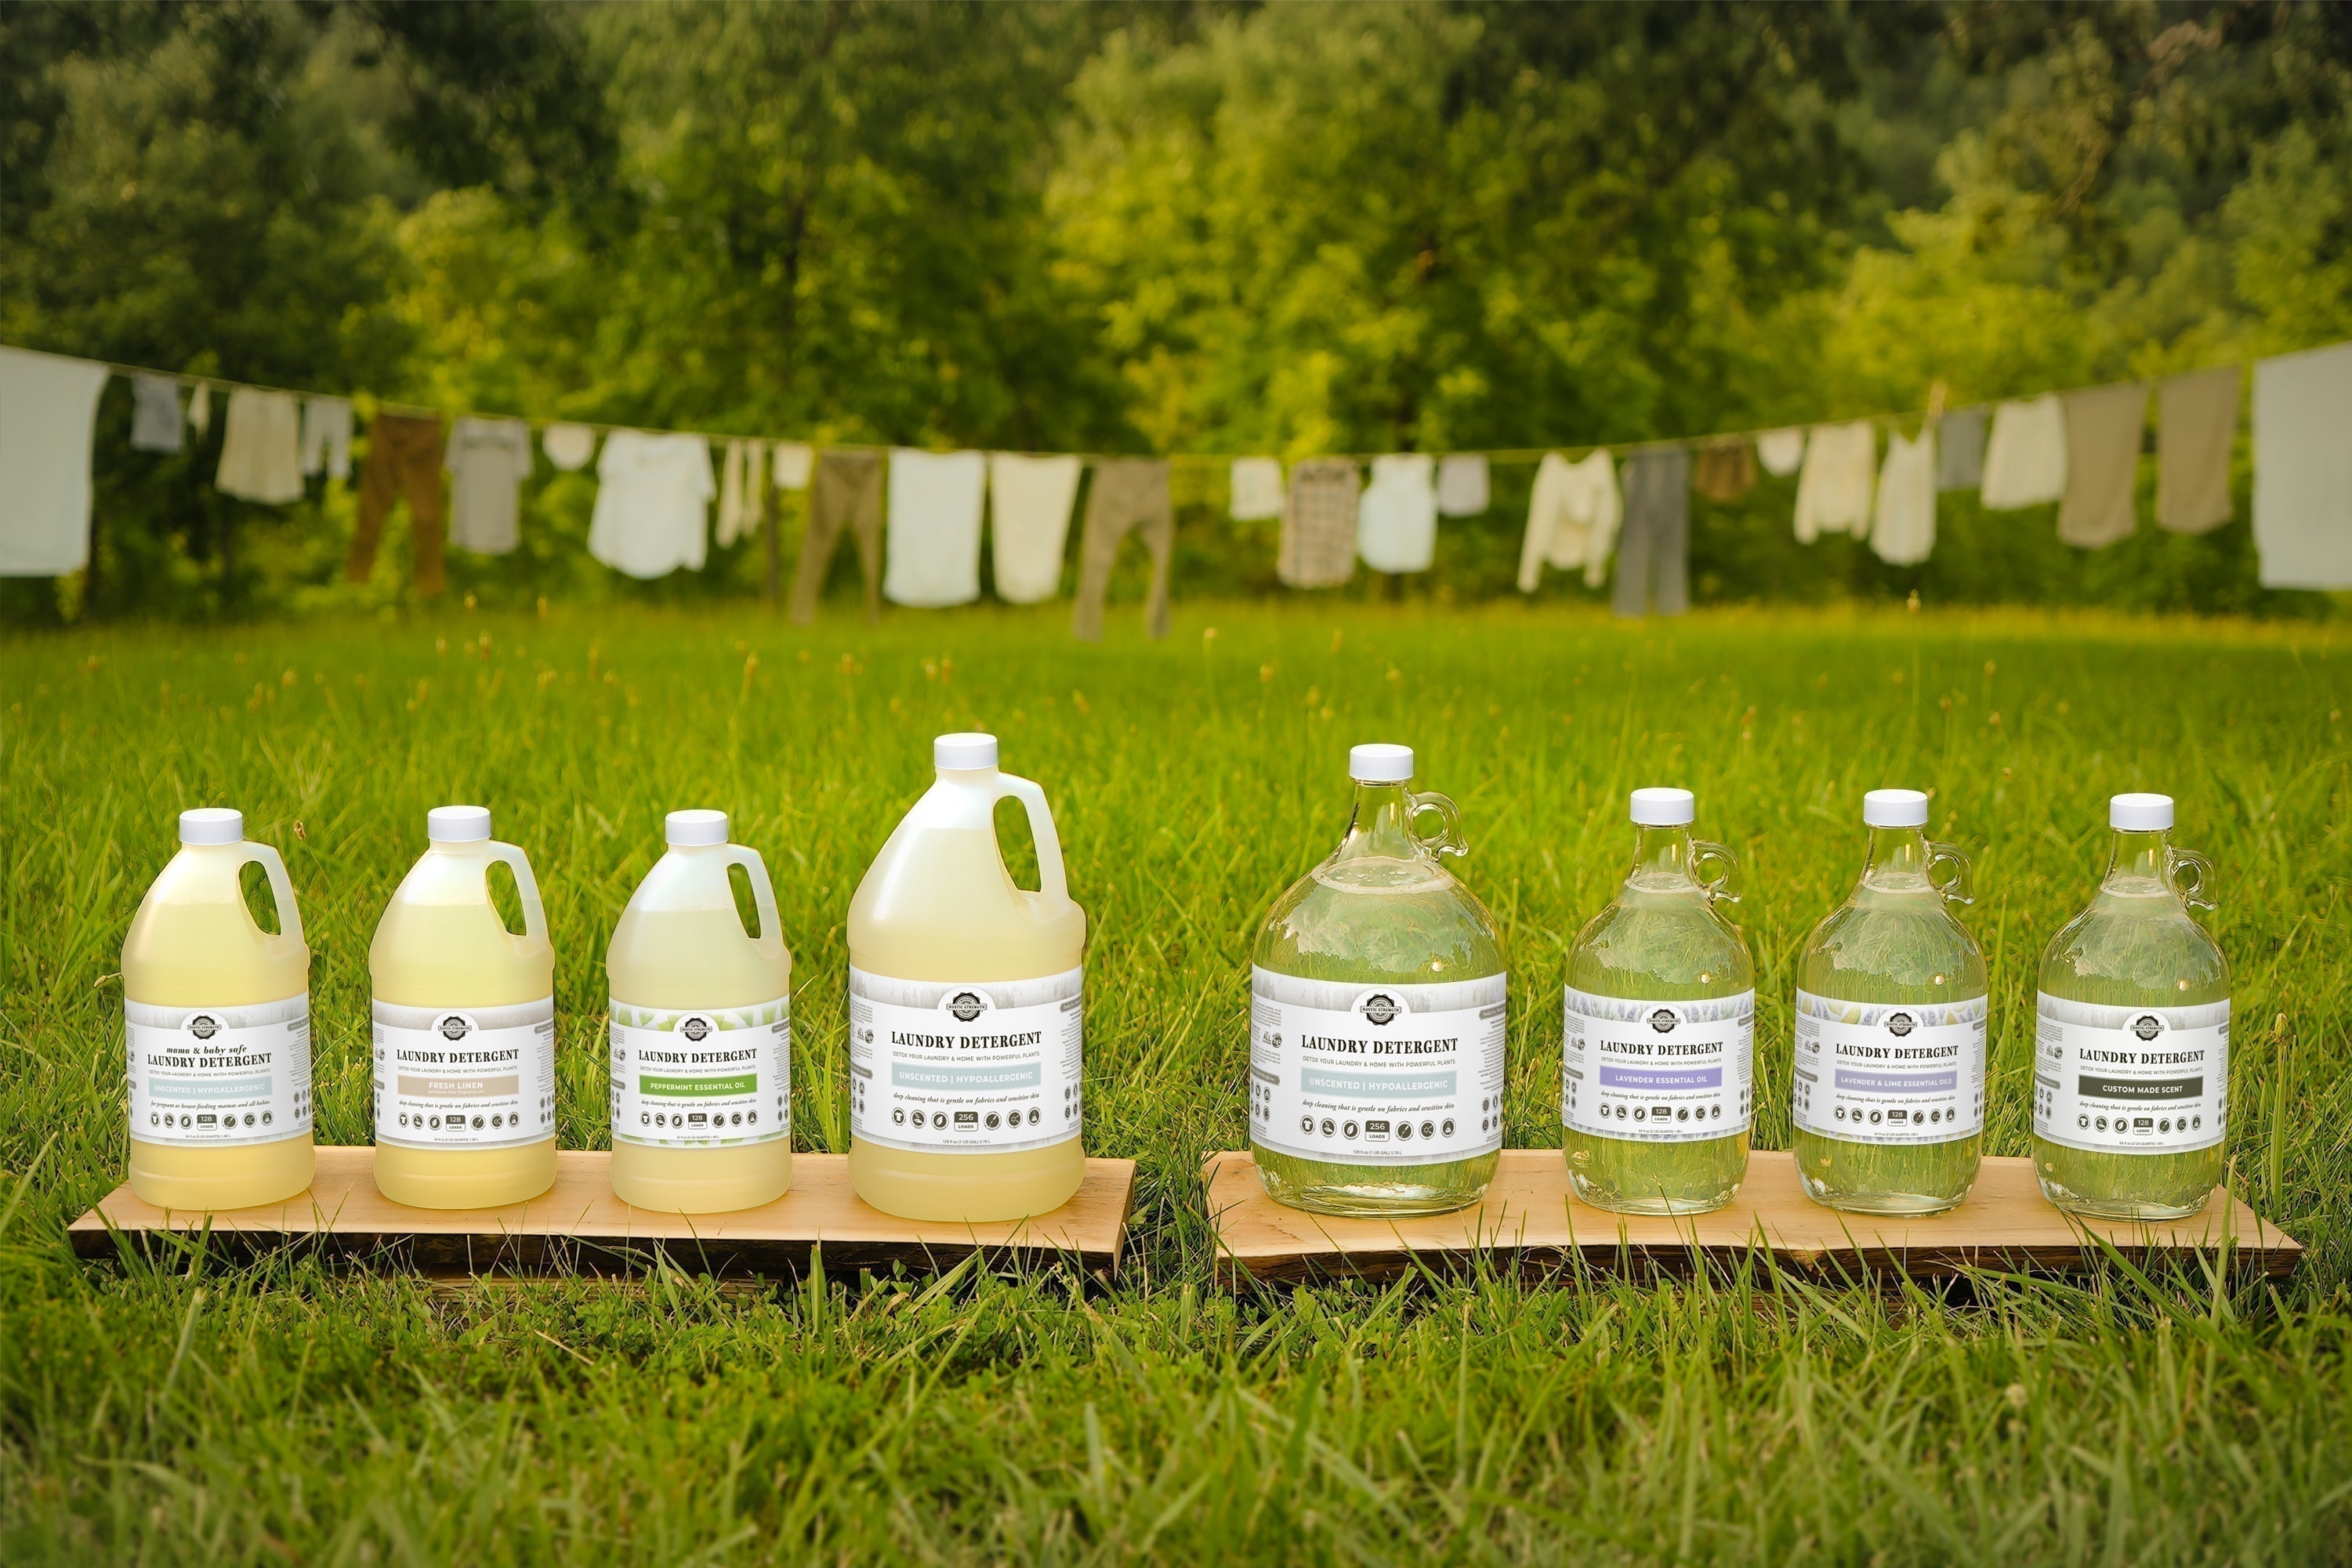


To set up the Eco-Jug for dispensing:
1. Remove the cap. (First, pry the grip ring off. It helps to use a towel to grip the cap to remove it or use a jar opener.)
2. Remove the center of the cap with a hole saw, drill, screwdriver, scissors or knife.

If you do not have a hole saw, making a series of small holes (with your tool of choice) allows the center of the cap to be pulled out easily. Be careful not to damage the threads in the cap.

3. After removing the center, tighten the cap onto the jug then screw in the spigot for dispensing.
4. To allow the product to flow, remove the smaller cap (may be blue or white). Puncture or remove the heat or pressure seal, then replace the cap. Leaving the cap loose will allow air to enter for the product flow quicker through the dispensing spout.
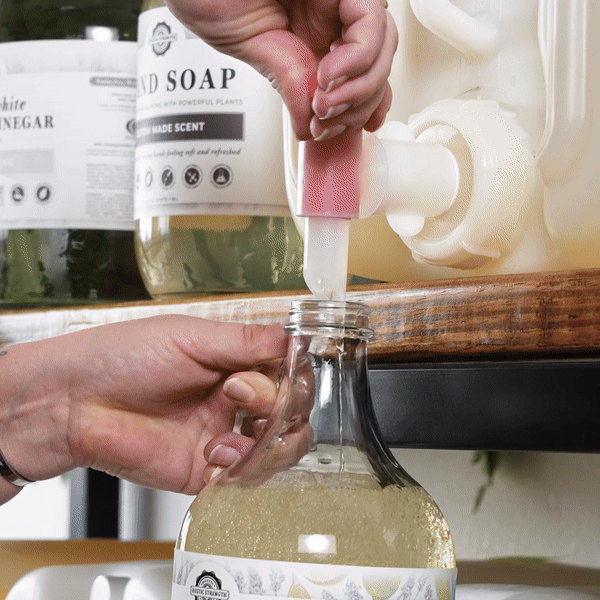
5. To prevent leaks when using a spout, be sure that the spout is turned to off position when not in use. You will be able to see the opening in the red mechanism through the clear stem. Our All-In-One Spout also turns 360°. Turn it up after dispensing to prevent leaks. Your Eco-Jug can also be stored upright for even more peace of mind.


5a. To prevent leaks when using a pump, ensure that the pump is fully returning to it's fully extended position. Some pumps may require a light pull, or may take a little while to re-extend. If you are still experiencing leaks, we recommend using a drip-cup. We may also be able to offer a pump plug, if your leak is persistent. Please reach out to Customer Care for the best solution.